In a world where digital images flash by at lightning speed, there’s something timeless about capturing those special moments in a beautifully crafted photo frame. Personalized photo frames not only preserve memories but also add a unique touch to your home decor or make heartfelt gifts for loved ones. This blog post will guide you through the process of creating your own personalized photo frames, from gathering the necessary materials to showcasing your finished masterpiece. Whether you’re a seasoned DIY enthusiast or just starting out, you’ll find plenty of inspiration and practical tips to get you started.
Getting Started Essential Materials and Tools for Crafting Your Frame
Before you can transform your vision into reality, you’ll need to gather some basic materials and tools. A trip to your local craft store or a quick online search will provide everything you need to get started. For the frame itself, wood is a popular choice due to its versatility and ease of customization. However, metal and acrylic frames can also be used for a more modern look. Don’t forget to pick up some primer, paint, and brushes if you plan to add color to your frame.
In addition to the frame, you’ll need some accessories to personalize your creation. These might include decorative embellishments such as beads, buttons, or fabric scraps. Adhesives like glue or double-sided tape will help secure these elements in place. Other useful tools include a ruler or measuring tape, scissors, and a hot glue gun. Having the right tools on hand will make the process smoother and more enjoyable.
Lastly, consider what you’ll need to display your finished photo frame. Picture hanging hardware or an easel stand might be required, depending on how you plan to showcase your work. With all these materials and tools ready, you’re well-equipped to begin your creative adventure.
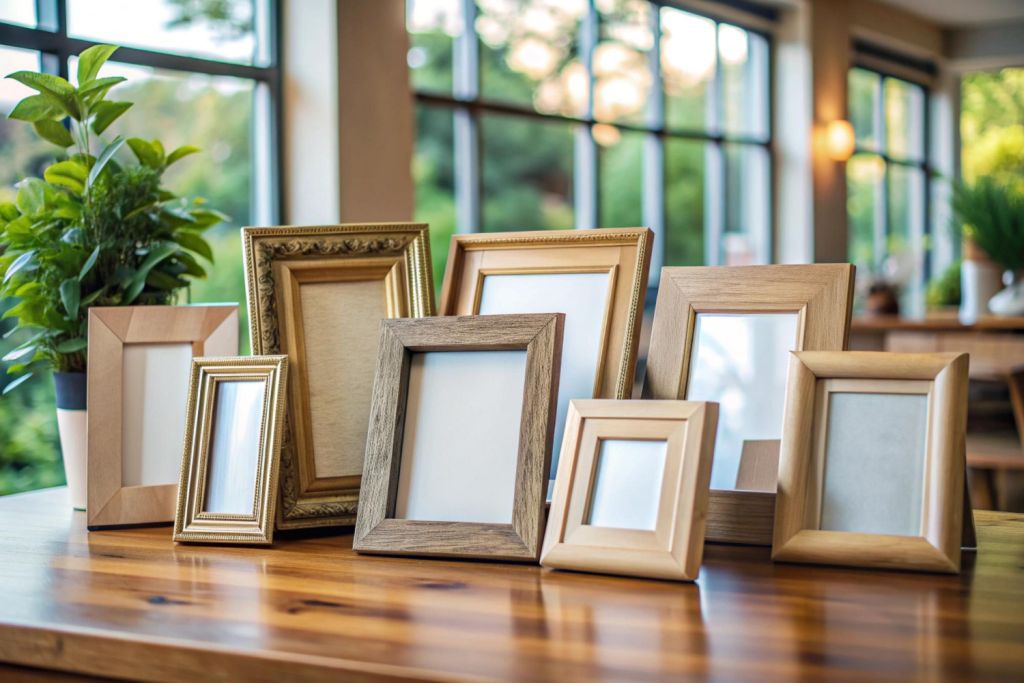
Choosing the Right Frame Tips for Selecting Size Material and Style
Selecting the perfect frame for your project is a crucial step in bringing your vision to life. The size of the frame should complement the photo you intend to display, enhancing rather than overpowering it. For smaller photos, a simple frame with minimal embellishments can be quite effective. Larger photos, on the other hand, may benefit from a more elaborate frame that draws the eye.
Material choice plays a significant role in the overall aesthetic of your personalized photo frame. Wooden frames offer warmth and can be easily painted or stained to match your decor. Metal frames, such as aluminum or stainless steel, provide a sleek and modern look. Acrylic frames offer a contemporary touch and are available in various colors and finishes.
Style is another essential consideration when choosing a frame. Think about the theme of the photo and how the frame can complement it. A vintage-style frame might suit an old family photograph, while a more whimsical frame could be perfect for a child’s artwork. Ultimately, the right frame should reflect your personal taste and the story behind the photo.
Personalization Ideas Creative Ways to Make Your Frame Unique
Once you’ve chosen the perfect frame, it’s time to get creative with personalization. Painting is one of the simplest ways to add color and character to your frame. Consider using stencils or masking tape to create patterns or designs. Metallic paints can add a touch of glamour, while chalk paints offer a rustic, shabby-chic look.
Adding embellishments is another great way to personalize your frame. You can use beads, ribbon, or fabric to create texture and interest. Consider incorporating items that hold personal significance, such as seashells from a memorable beach vacation or buttons from a favorite garment. The possibilities are endless, and the key is to infuse your frame with elements that resonate with you.
Incorporating themes can also enhance the personalization of your photo frame. For instance, a nautical theme might include anchors, starfish, and stripes, while a nature-inspired frame could feature leaves, flowers, and earthy tones. Themes help tie your design together and create a cohesive look.
Step-by-Step Guide Bringing Your Personalized Frame to Life
Creating a personalized photo frame is a rewarding project that allows you to express your creativity. Follow these step-by-step instructions to bring your design to life:
- Prepare the Frame Begin by cleaning your chosen frame to ensure a smooth surface for painting or decorating. Sand any rough edges if necessary, and apply a coat of primer to help the paint adhere.
- Paint the Base Apply your chosen paint color to the frame, using even strokes for a smooth finish. Depending on the desired look, you may need to apply multiple coats. Allow the paint to dry completely between coats.
- Add Embellishments Once the paint has dried, it’s time to add your chosen embellishments. Use glue or double-sided tape to attach beads, buttons, or other decorative elements. Arrange them in a way that enhances the overall design.
- Incorporate Themes If you’re working with a specific theme, incorporate related elements into your design. For example, add small seashells or starfish for a beach-themed frame.
- Apply Finishing Touches Once you’re satisfied with the design, consider applying a clear sealant or varnish to protect the frame and add a glossy finish.
- Insert Your Photo Carefully insert your chosen photo into the frame, ensuring that it is centered and secure.
- Display Your Masterpiece Decide how you’d like to showcase your frame. Whether it’s hanging on a wall, placed on a mantelpiece, or given as a thoughtful gift, your personalized photo frame is sure to be cherished.
Showcasing Your Work Creative Ways to Display Your Personalized Frames
Now that your personalized photo frame is complete, it’s time to display it proudly. Consider placing it in a prominent spot in your home, such as a mantelpiece or bookshelf, where it can be admired by family and friends. Grouping several frames together can create a stunning gallery wall that tells a story and adds character to any room.
If you’re gifting your personalized frame, consider presenting it in a beautiful gift box or wrapping it in elegant paper. Adding a handwritten note or a special message can make the gift even more meaningful. Personalized photo frames make wonderful gifts for birthdays, anniversaries, or any special occasion.
For those who enjoy sharing their creations with a wider audience, social media platforms offer an excellent way to showcase your work. Share photos of your personalized frames along with a brief description of your creative process. Engaging with fellow DIY enthusiasts and home decorators can lead to valuable connections and inspiration for future projects.
Conclusion The Joy of Crafting Personalized Photo Frames
Creating personalized photo frames is a fulfilling and enjoyable endeavor that allows you to capture memories while expressing your unique style. By following the steps outlined in this guide, you’ll be well on your way to crafting beautiful frames that enhance your home decor or make thoughtful gifts for loved ones.
The process of selecting materials, choosing a design, and adding personal touches is not only creative but also deeply satisfying. Each frame becomes a reflection of your creativity and the stories behind the photos it holds. Whether you’re a seasoned DIY enthusiast or a beginner, the joy of crafting personalized photo frames is an experience worth exploring.
For those eager to continue their creative journey, there are endless possibilities and resources available to inspire and guide you. Online communities, workshops, and tutorials offer valuable insights and support. Remember, the most important aspect of crafting is to enjoy the process and celebrate the memories captured within your personalized photo frames.